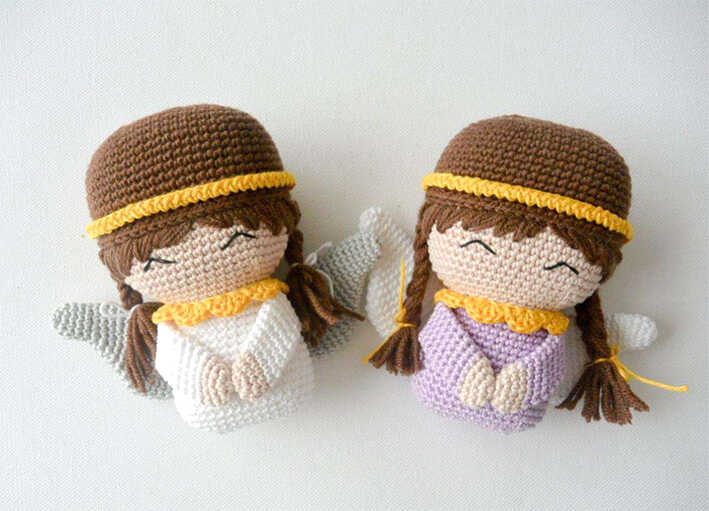
Free Christmas Angel Amigurumi Pattern You’ll Want to Make
Designer: Unknown
Difficulty Level: Intermediate
A peaceful handmade project to add a soft holiday touch to your crochet time.
Create something beautiful with this free Christmas angel amigurumi pattern, a charming seasonal design perfect for handmade holiday decor, a thoughtful handmade gift idea, or a cozy crochet project. With delicate shaping and sweet embroidered details, this angel brings classic festive warmth to your collection. We sincerely appreciate the designer for sharing this lovely pattern, and you’ll also find more inspiring Christmas angel amigurumi ideas waiting at the end of the pattern.
This is an intermediate amigurumi pattern with separate shaping details and finishing work that create a polished result. If you enjoy elegant animal designs, you might also love the baby swan amigurumi from one of our other blogs.
The pattern uses cotton yarn for a crisp, clean finish and a 2.00 mm hook for refined detail work. Basic tools keep the setup simple, though the finishing requires a steady hand. You may also enjoy the little deer amigurumi as another charming seasonal animal project.
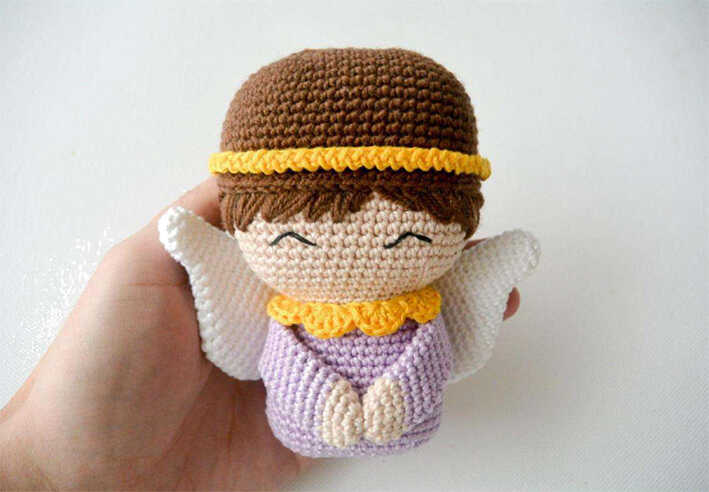
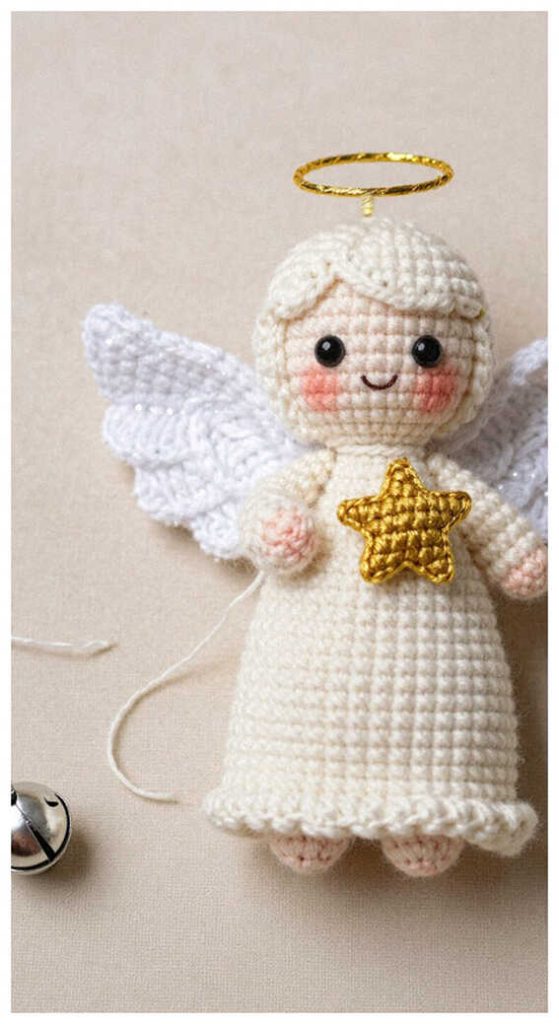
You’ll love seeing how this Christmas angel takes shape through delicate festive details.
Materials and Tools
• Yarn:
▸ Cotton yarn — white
▸ Cotton yarn — beige
▸ Cotton yarn — yellow
▸ Cotton yarn — gray
• 2.00 mm crochet hook
• Fiberfill stuffing
• Sewing needle
• Scissors
• Black embroidery thread
Abbreviations
MR — magic ring
ch — chain
sl st — slip stitch
sc — single crochet
dc — double crochet
inc — increase
dec — decrease
(…) x n — repeat n times
HOW TO MAKE A CHRISTMAS ANGEL AMIGURUMI YOU’LL WANT TO MAKE
Head
Use beige yarn with a 2.00 mm crochet hook.
R1: Ch 11
R2: Starting in the 2nd chain from hook: inc, 8 sc, 3 sc in one stitch, working on the opposite side of the chain: 9 sc (22)
R3: 2 inc, 8 sc, 3 inc, 8 sc, inc (28)
R4: (1 sc, inc) x 2, 8 sc, (1 sc, inc) x 3, 9 sc, inc (34)
R5: (2 sc, inc) x 2, 8 sc, (2 sc, inc) x 3, 10 sc, inc (40)
R6: (3 sc, inc) x 2, 8 sc, (3 sc, inc) x 3, 11 sc, inc (46)
R7: (4 sc, inc) x 2, 8 sc, (4 sc, inc) x 3, 12 sc, inc (52)
R8: 52 sc
R9: 5 sc, inc, 25 sc, inc, 20 sc (54)
R10–R21: 54 sc
R22: 5 sc, dec, 25 sc, dec, 20 sc (52)
R23: 51 sc, place marker (51)
R24: (dec, 4 sc) x 3, 8 sc, (dec, 4 sc) x 3, 8 sc (46)
R25: (dec, 3 sc) x 3, 8 sc, (dec, 3 sc) x 3, 8 sc (40)
R26: (dec, 2 sc) x 3, 8 sc, (dec, 2 sc) x 3, 8 sc (34)
R27: (dec, 1 sc) x 3, 8 sc, (dec, 1 sc) x 3, 8 sc (28)
Change to white yarn.
R28: 28 sc
Stuff the head firmly, especially the lower part.
Body
R29: 2 sc, 3 inc, 11 sc, 3 inc, 9 sc (34)
R30: 34 sc
R31: 5 sc, inc, 16 sc, inc, 11 sc (36)
R32: 36 sc
R33: 6 sc, inc, 17 sc, inc, 11 sc (38)
R34: 38 sc
R35: 7 sc, inc, 18 sc, inc, 11 sc (40)
R36–R42: 40 sc
R43: 3 sc, (dec, 2 sc) x 3, 8 sc, (dec, 2 sc) x 3, 5 sc (34)
R44: 3 sc, (dec, 1 sc) x 3, 8 sc, (dec, 1 sc) x 3, 5 sc (28)
R45: 3 sc, 3 dec, 8 sc, 3 dec, 5 sc (22)
Stuff the body.
Leave a long tail for sewing.
Close the opening by sewing through the front loops of each stitch.
Arms
Use beige yarn with a 2.00 mm crochet hook.
R1: 6 sc in MR (6)
R2: inc x 6 (12)
R3: inc, 5 sc, dec, 4 sc (12)
In the following rounds, move the stitch marker forward by 1 stitch in each round so the increases and decreases stay aligned.
R4: 1 sc, move marker, inc, 5 sc, dec, 4 sc (12)
Change to white yarn.
R5: 1 sc, move marker, inc, 5 sc, dec, 4 sc (12)
R6–R12: 1 sc, move marker, inc, 5 sc, dec, 4 sc (12)
Left Arm
Work 2 additional sc.
Fold in half and crochet through both layers: 5 sc.
Leave a long tail for sewing.
Right Arm
Work 7 additional sc.
Fold in half and crochet through both layers: 5 sc.
Leave a long tail for sewing.
Wings
Use gray yarn with a 2.00 mm crochet hook.
For the wings, a softer yarn is recommended. The original design uses 60% wool yarn, but acrylic can also be used. Cotton is not recommended.
R1: 5 sc in MR (5)
R2: inc x 5 (10)
R3–R5: 10 sc
R6: 9 sc, 3 sc in last stitch (12)
R7: 10 sc, 3 sc in one stitch, 1 sc (14)
R8: 11 sc, 3 sc in one stitch, 2 sc (16)
R9: 12 sc, 3 sc in one stitch, 3 sc (18)
R10: 13 sc, 3 sc in one stitch, 4 sc (20)
R11: 14 sc, 3 sc in one stitch, 5 sc (22)
R12: 15 sc, 3 sc in one stitch, 6 sc (24)
R13–R17: 24 sc
R18: 16 sc, 2 dec, 4 sc (22)
R19: 15 sc, 2 dec, 3 sc (20)
R20: 14 sc, 2 dec, 2 sc (18)
R21: 13 sc, 2 dec, 1 sc (16)
R22: (2 sc, dec) x 4 (12)
R23: (2 sc, dec) x 3 (9)
Left Wing
Work 1 additional sc.
Fold in half and crochet through both layers: 4 sc.
Leave a long tail for sewing.
Right Wing
Work 5 additional sc.
Fold in half and crochet through both layers: 4 sc.
Leave a long tail for sewing.
Hair Cap
Use brown yarn with a 2.00 mm crochet hook.
R1: Ch 11
R2: Starting in the 2nd chain from hook: inc, 8 sc, 3 sc in one stitch, working on the opposite side of the chain: 9 sc (22)
R3: 2 inc, 8 sc, 3 inc, 8 sc, inc (28)
R4: (1 sc, inc) x 2, 8 sc, (1 sc, inc) x 3, 9 sc, inc (34)
R5: (2 sc, inc) x 2, 8 sc, (2 sc, inc) x 3, 10 sc, inc (40)
R6: (3 sc, inc) x 2, 8 sc, (3 sc, inc) x 3, 11 sc, inc (46)
R7: (4 sc, inc) x 2, 8 sc, (4 sc, inc) x 3, 12 sc, inc (52)
R8: 52 sc
R9: 5 sc, inc, 25 sc, inc, 20 sc (54)
R10–R17: 54 sc
Cut yarn, leaving a long tail for sewing.
Place the hair cap onto the head. Use pins to mark the hairline. This line marks the boundary between the hair cap and the head.
Hair Embroidery
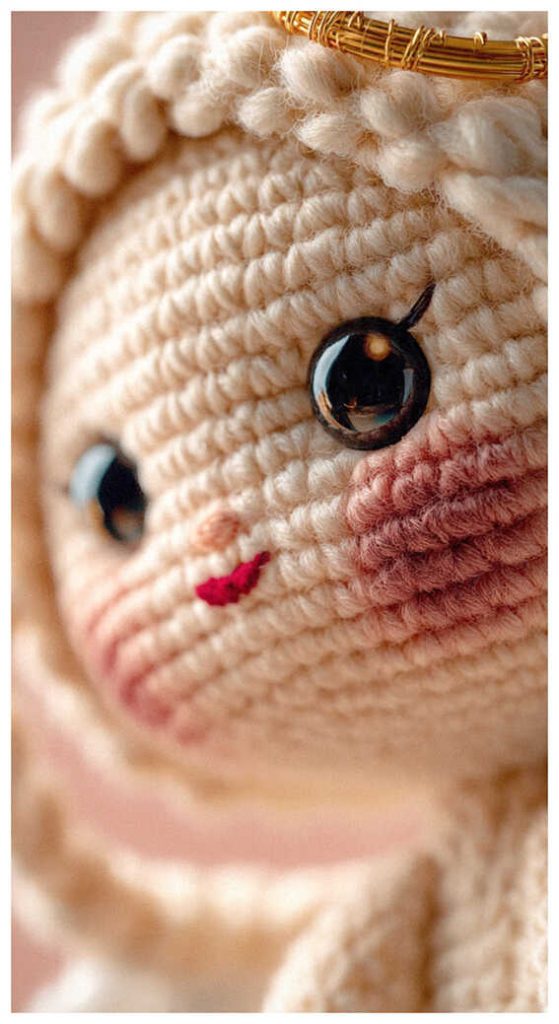
Embroider the hair strands approximately 4 stitches long and 2 stitches high, following the original visual reference.
If using thinner yarn, pass the needle through the upper line 2–3 times for fuller coverage.
Each next hair strand should be placed 1 stitch longer downward.
Continue toward the center corner.
Cut yarn and leave a tail for the second side.
For the side hair sections, continue adding strands evenly until the desired fullness is reached, following the original shaping.
Headband
Use yellow yarn.
Ch 60 and join into a ring.
Work loosely:
(1 ch, 1 sl st in the same stitch) to the end of the round.
Scarf
Use white yarn.
Ch 32.
Skip 1 stitch, 5 dc in one stitch, skip 1 stitch, sl st.
Repeat until you have 8 scallops.
Use the yarn tails as ties.
Assembly
– Sew the arms to the body.
– Sew the wings to the back of the body.
– Place and sew the hair cap securely onto the head along the marked hairline.
– Attach the headband around the hair cap.
– Tie the scarf around the neck using the yarn tails.
– Using black embroidery thread, embroider the eyes as shown in the original design.
Sweet amigurumi angel designs make a lovely handmade gift idea. Wondering who is this for? They’re a perfect gift for holiday decor lovers, baby showers, and thoughtful keepsakes. It’s easy to see why people love this style—soft charm and timeless handmade sweetness.
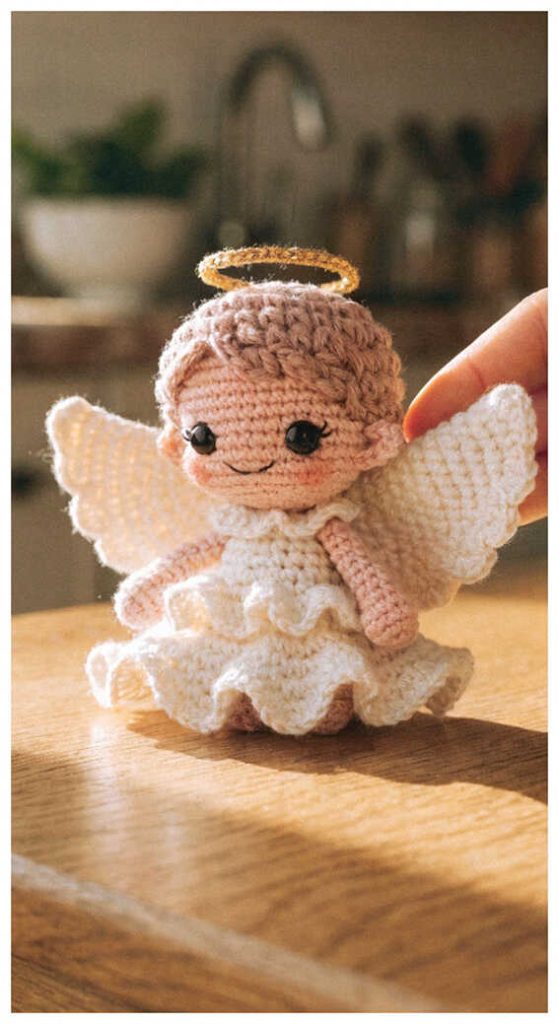
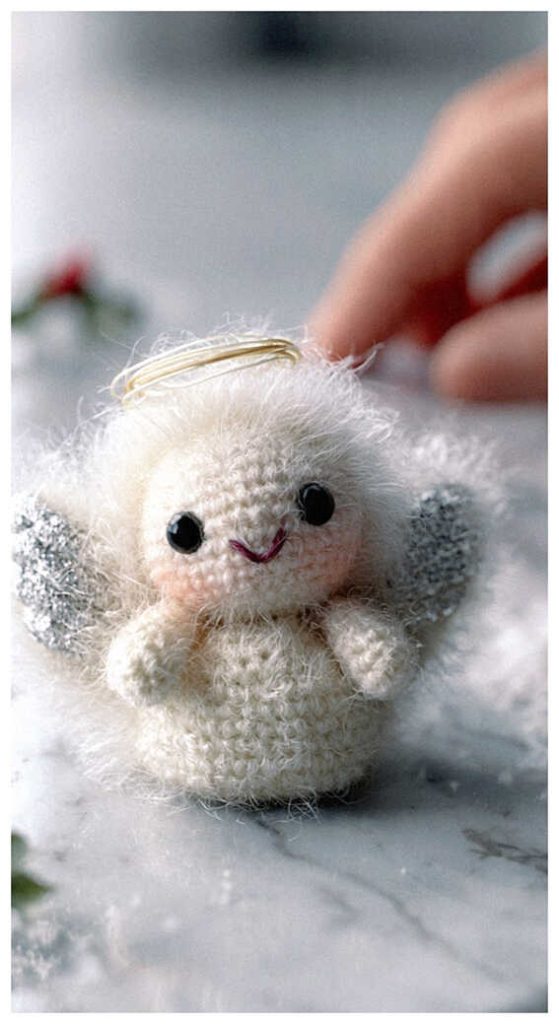
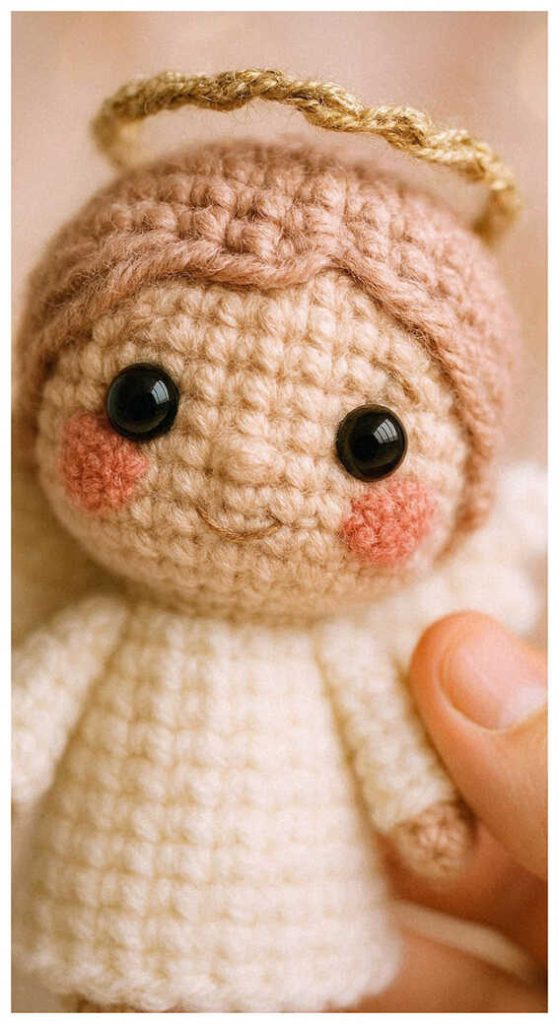
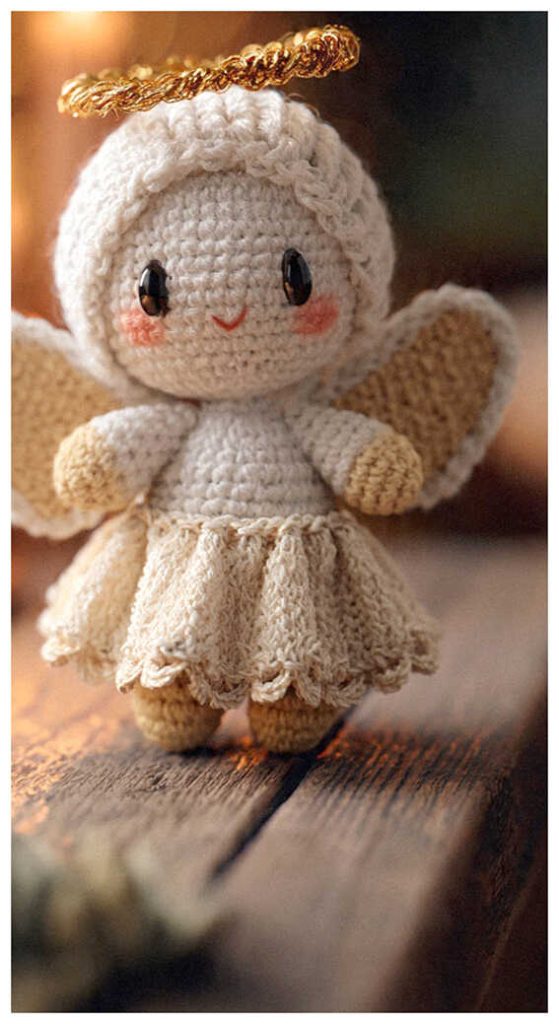
Soft Crochet Angel Inspiration for Cozy Handmade Decor