
Cute Chunky Clownfish Free Amigurumi Pattern
Designer: Sabrina Santoro
Instagram: @blue.beena
Etsy Shop: Pinkybina
Difficulty Level: Easy
A Playful Ocean Friend for Your Crochet Collection.
Looking for a relaxing project with a cheerful ocean theme? This free clownfish amigurumi pattern designed by Sabrina Santoro is a wonderful choice for anyone who enjoys making a cute crochet animal with a soft, chunky finish. Its simple shaping and minimal assembly make it suitable for Easy Crochet Projects, beginner-friendly amigurumi, and low sew crochet patterns. We sincerely thank Sabrina Santoro for sharing this adorable design with the crochet community.
The pattern is written in an easy-to-follow format using basic stitches, making it a fun quick crochet project for a cozy afternoon. If you enjoy sea-inspired creations, don’t forget to visit the mini shark on our blog for more beginner-friendly inspiration.
This design works beautifully with plush yarn for a cuddly look, while different yarn choices can easily change the final size. You only need a few basic supplies to get started. You may also love the tiny whale featured on our blog. Keep scrolling to discover more adorable clownfish and ocean amigurumi ideas waiting below.
You’ll love seeing how this chunky clownfish gains its playful ocean charm.
HOW TO MAKE A CUTE CHUNKY CLOWNFISH
Materials:
• Yarn: make sure to have i full skein for your main colour and at least half skein for your second colour.
• Poly-fill stuffing.
• Safety eyes: size depends on the yarn you choose for your plushie, I used 16 mm for reference.
• Yarn needle/stitch marker/scissors.
• Crochet hook: size depend on your yarn choice, I used a size 5 mm for reference.
Abbreviations:
MR: magic ring
sc: single crochet
dec: decrease
inc: increase
st: stitch
FO: fasten off
slst: slip stitch
R: round
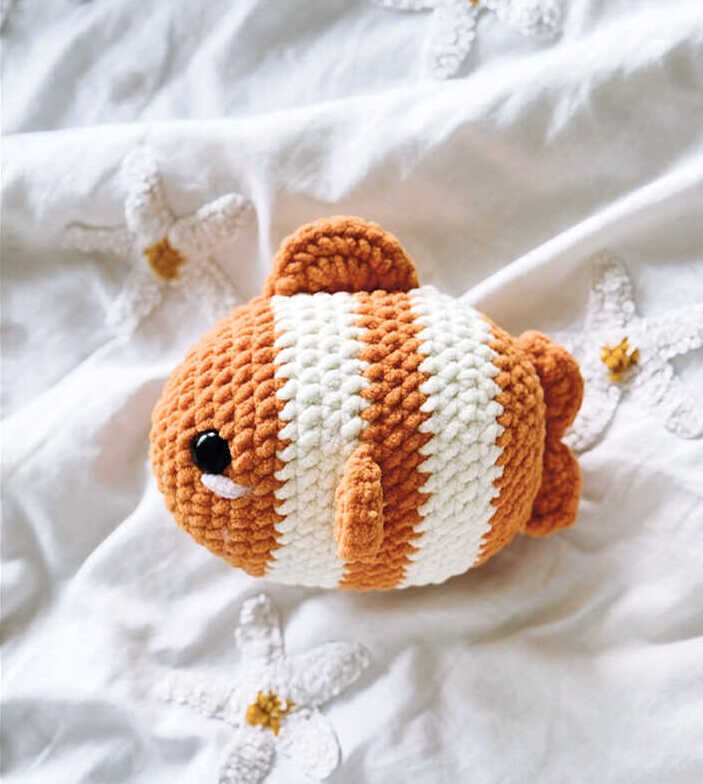
We’ve reviewed the necessary materials and are now ready to begin. First, let’s build a body for Nemo.
CUTE CLOWNFISH AMIGURUMI FREE PATTERN
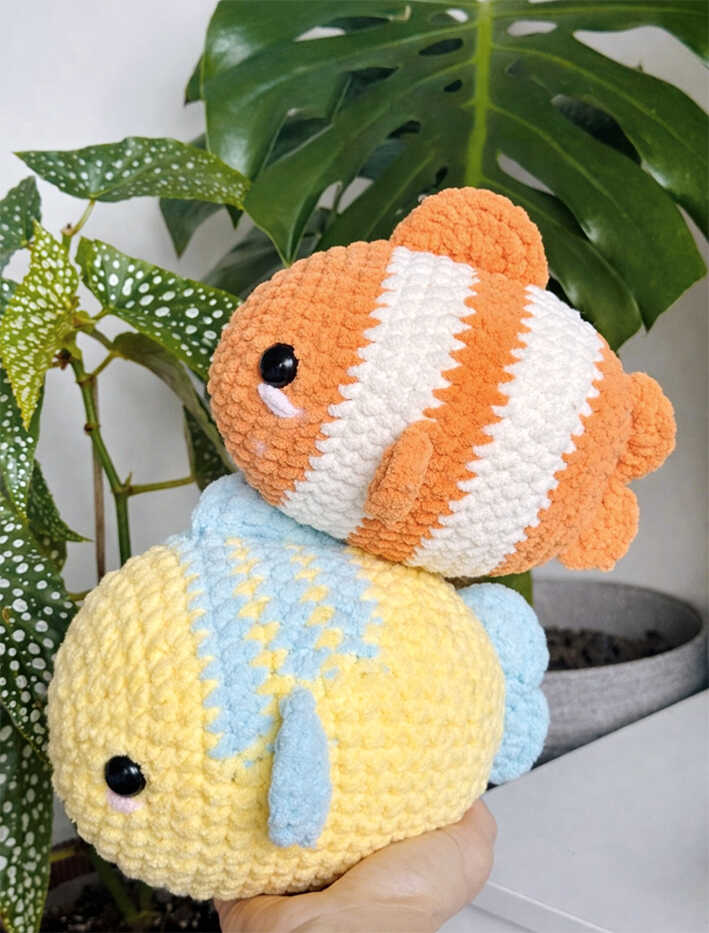
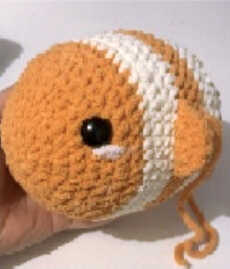
Body (nemo)
Colour 1: orange.
Colour 2: white.
Start in colour 1:
R1: 8sc in Mr
R2: inc around (16)
R3: (sc, inc)x8 (24)
R4: (2sc inc)x8 (32)
R5: sc around (32)
R6: (3sc, inc) x8 (40)
R7: sc around (40)
R8: (4sc, inc)x8 (48)
R9: sc around (48)
Change to colour 2
R10-13: sc around (48) *4 rnds
Change to colour 1
R14-16: sc around (48) *3 rnds
Change to colour 2
R17-19: sc around (48) *3 rnds
Add eyes between R 6-7 opposite to each other.
R20: (4sc, dec)x8 (40)
Change to colour 1
R21: sc around (40)
R22: (3sc, dec)x8 (32)
Add stuffing.
R23: sc around (32)
R24: (2sc, dec)x8 (24)
R25: sc around (24)
R26: (sc, dec)x8 (16)
R27: dec around (8)
Add more stuffing. F.o and sew close.
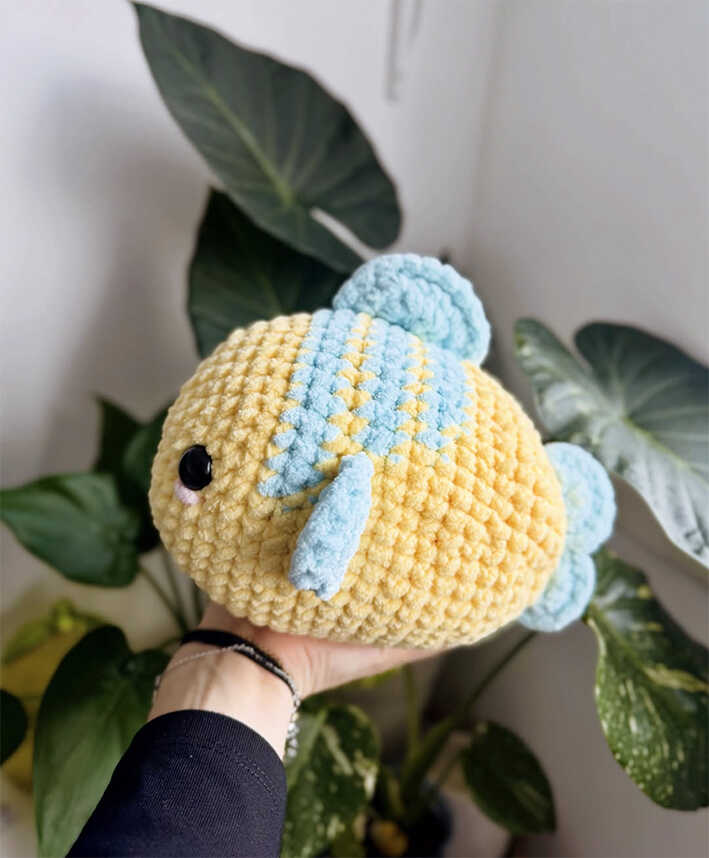
Now let’s build the flounder’s body. You’ll see how to adjust the colors below.
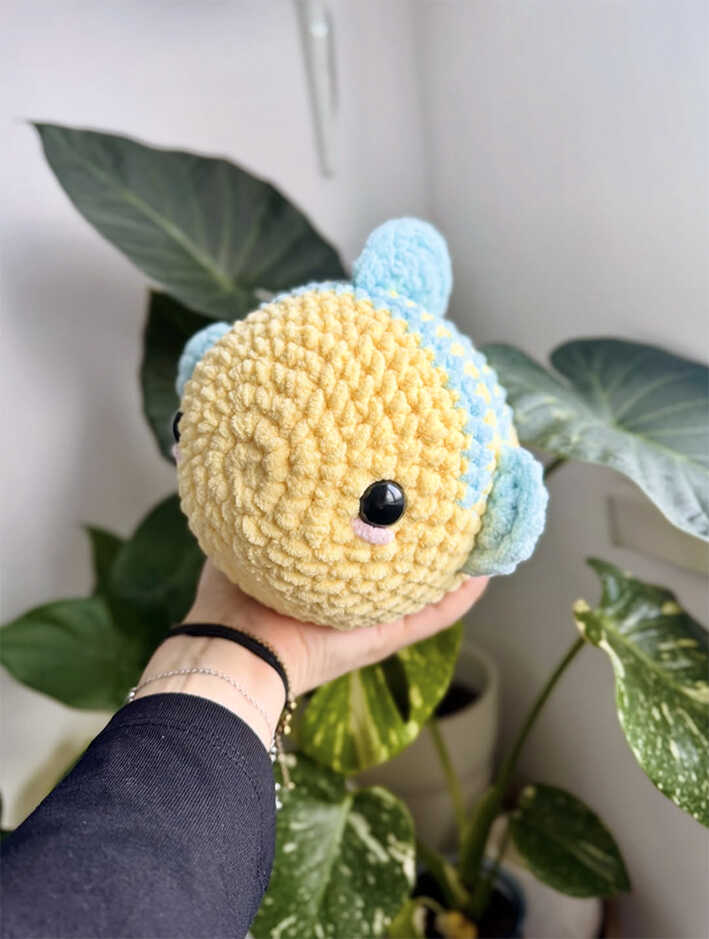
Body (flounder)
Colour 1: yellow.
Colour 2: light blue.
Start in colour 1:
R1: 8sc in Mr
R2: inc around (16)
R3: (sc, inc)x8 (24)
R4: (2sc inc)x8 (32)
R5: sc around (32)
R6: (3sc, inc)x8 (40)
R7: sc around (40)
R8: (4sc, inc)x8 (48)
R9: sc around (48)
In the next rounds we start colour changing.
R10-11: 12sc (CC to colour 2) 24sc (CC to colour 1) 12 sc (48)
R12: sc around (48)
R13-14: 14sc (CC to colour 2) 20 (CC to colour 1) 14sc (48)
R15: sc around (48)
R16-17: 16 (CC to colour 2) 18sc (CC to colour 1) 16sc (48)
R18-19: sc around (48)
Add eyes between R 6-7 opposite to each other.
R20: (4sc, dec)x8 (40)
R21: sc around (40)
R22: (3sc, dec)x8 (32)
Add stuffing.
R23: sc around (32)
R24: (2sc, dec)x8 (24)
R25: sc around (24)
R26: (sc, dec)x8 (16)
R27: dec around (8)
Add more stuffing.
F.o and sew close.
Now we can make the upper and dorsal fins. As a final touch, we will attach them to the body.
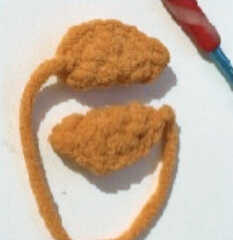
Fins (make 4)
R1: 8 sc in MR
R2: inc around (16)
Fold in half.
R3: sc across both sides (8)
FO. And leave a long to sew to the body.
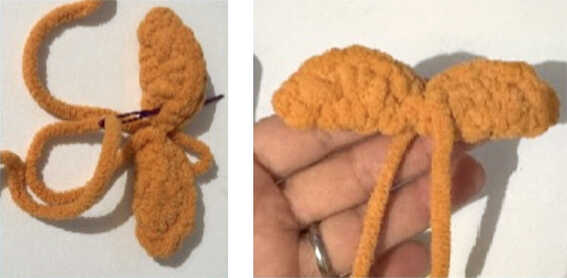
Upper fin
R1: 8 sc in MR
R2: inc around (16)
R3: (sc,inc)x8 (24)
Fold in half.
R4: sc across both sides (12)
FO. And leave a long tail to sew the body.
Attach finns to the body
– Upper finn: using the eyes as a reference, attach the big Finn just in the middle of the upper part, starting from R 11/12 and ending in R 16/17 (See photos for reference)
– Sides finns: attach on each side of the body opposite to each other, between R14-15. (See photos for reference)
– Back finns: we are gonna attach 2 > small finns at the back of our fish just where we f,o. the body, they will be vertically sewed one upon the other and our goal is to make it look like only one Finn so they will be very close to each other. (See photos for reference)
You can use some of the thread to sew them together before proceeding to attaching them to the body.