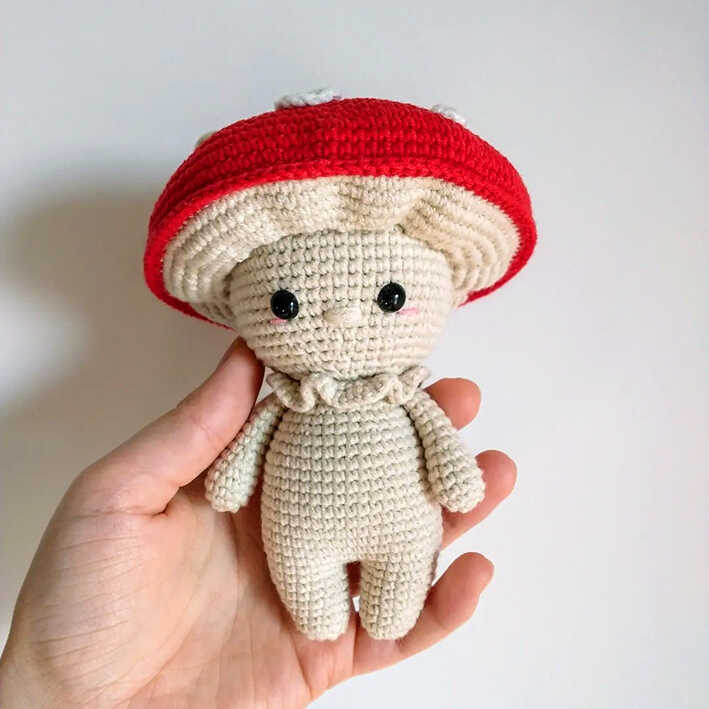
Cute Mushroom Doll Amigurumi Free Crochet Pattern
Designer: Neatly Stitched
Instagram: @neatly.stitched
Difficulty Level: Easy
A cozy woodland-inspired amigurumi project to add cottagecore charm to your crochet time.
This free Mushroom Doll Amigurumi pattern is designed by Neatly Stitched (@neatly.stitched) and features an adorable mushroom character with sweet, balanced proportions. With its soft shaping and playful forest vibe, this design makes a lovely choice for DIY Crochet Gift Ideas, nursery decor, or cozy seasonal displays. Character dolls like the seagull amigurumi show how nature-themed designs can become customer favorites. We sincerely thank Neatly Stitched for sharing this charming mushroom doll pattern with the crochet community.
This is a beginner-friendly amigurumi pattern written in clear US terminology and does not use advanced techniques. The smooth construction makes it enjoyable to follow, and it works well as a Quick to Make Amigurumi completed at a relaxed pace. If you enjoy sweet forest characters, you might also love the cute bunny amigurumi featured on our blog.
The pattern uses fine weight yarn in dark red, beige, peach, and black with a 2.5 mm crochet hook for crisp stitch definition. You will also need stuffing, 7 mm safety eyes, pins, and basic tools. The finished toy measures about 6 inches (15 cm), and you can adjust the size by changing yarn weight and hook size. At the end of the pattern, you will also find related amigurumi ideas shared for extra inspiration.
Materials
2/sport/fine weight yarn in colors: cream, red, white and pink (optional)
2.5mm crochet hook
Stuffing of your choice
Tapestry needle
x2 7mm safety eyes
Scissors
Pins
Note:
The yarn I used:
Yarnart Jeans (55% cotton,
45% PAC) in colors:
#05 – cream
#90 – red
#01 – white
#74 – pink (optional)
Abbreviations
Mr – magic ring
Ch – chain
Sc – single crochet
Inc – increase
Dec – decrease
Dc – double crochet
R# – row number
(#) – number of stitches in the row
( ) x# – repeat sequence
FLO – front loop only
CUTE MUSHROOM DOLL AMIGURUMI FREE PATTERN
Arms (make 2)
Mr 5
R2: Inc 5 (10)
R3-6: Sc 10 (10)
R7: Sc 2, dec, sc 3, dec, sc (8)
R8-15: Sc 8 (8)
R16: Fold and sc 4 through both sides
Legs (make 2)
Mr 6
R2: Inc 6 (12)
R3-4: Sc 12 (12)
R5: Sc 5, inc 2, sc 5 (14)
R6: Sc 14 (14)
R7: Sc 6, inc 2, sc 6 (16)
R8: Sc 16 (16)
Body
Continue over the legs
R9: Sc 16 (over the first leg), ch 2, sc 16 (over the second leg), sc 2 (over the ch 2) (36)
R10: Sc 7, inc, sc 18, inc, sc 9 (38)
R11: Sc 8, inc, sc 18, inc, sc 10 (40)
R12-20: Sc 40 (40)
R21: Sc 6, dec, sc 2, dec, sc 14, dec, sc 2, dec, sc 8 (36)
R22: Sc 36 (36)
R23: Sc 2, (dec, sc 4) repeat 5 times, dec, sc 2 (30)
R24: Sc 30 (30)
R25: (Dec, sc 3) repeat 5 times (24)
R26: Sc 24 (24)
R27: Sc 3, sc 4 through the two loops of the body and two loops of the first arm crocheting the two pieces together, sc 9, sc 4 through the two loops of the body and two loops of the second arm crocheting the two pieces together, sc 4 (24)
R28: Inc 24 FLO (48)
R29: (Sc, inc) repeat 2 times4 (72)
Head
Mr 6
R2: Inc 6 (12)
R3: (Inc, sc) repeat 6 times (18)
R4: Sc 2, (inc, sc 2) repeat 5 times, inc (24)
R5: (Inc, sc 3) repeat 6 times (30)
R6: Sc 3, (inc, sc 4) repeat 5 times, inc, sc (36)
R7: (Inc, sc 5) repeat 6 times (42)
R8: Sc 4, (inc, sc 6) repeat 5 times, inc, sc 2 (48)
R9: (Inc, sc 7) repeat 6 times (54)
R10-18: Sc 54 (54)
R19: (Dec, sc 7) repeat 6 times (48)
Insert eyes between R16 and R17
Sew the nose (3 stitches long) between R17 and R18
Sew the blush under the eyes (optional)
R20: Sc 4, (dec, sc 6) repeat 5 times, dec, sc 2 (42)
R21: (Dec, sc 5) repeat 6 times (36)
R22: Sc 3, (dec, sc 4) repeat 5 times, dec, sc (30)
R23: (Dec, sc 3) repeat 6 times (24)
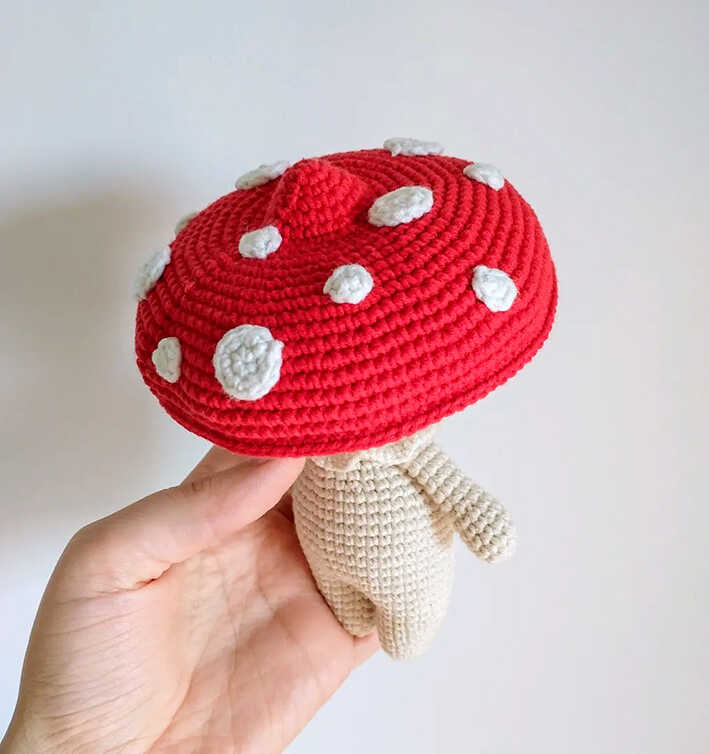
Hat (white part)
Mr 6
R2: Inc 6 (12)
R3: (Inc, sc) repeat 6 times (18)
R4: Sc 2, (inc, sc 2) repeat 5 times, inc (24)
R5: (Inc, sc 3) repeat 6 times (30)
R6: Sc 3, (inc, sc 4) repeat 5 times, inc, sc (36)
R7: (Inc, sc 5) repeat 6 times (42)
R8: Sc 4, (inc, sc 6) repeat 5 times, inc, sc 2 (48)
R9: (Inc, sc 7) repeat 6 times (54)
R10-15: Sc 54 (54)
R16: (Sc 2, inc) x18 (72)
R17: (Inc, sc 3) x18 (90)
R18: Sc 3, (inc, sc 4) x17, inc, sc (108)
R19-21: Sc 108 (108)
Hat (red part)
Mr 4
R2: Inc 4 (8)
R3: (Inc, sc) repeat 4 times (12)
R4: (Sc 2, inc) repeat 4 times (16)
R5: (Inc, sc 3) repeat 4 times (20)
R6: Sc 3, (inc, sc 4) repeat 3 times, inc, sc (24)
R7: (Inc, sc 3) repeat 6 times (30)
R8: Sc 3, (inc, sc 4) repeat 5 times, inc, sc (36)
R9: (Inc, sc 5) repeat 6 times (42)
R10: Sc 4, (inc, sc 6) repeat 5 times, inc, sc 2 (48)
R11: (Inc, sc 7) repeat 6 times (54)
R12: Sc 5, (inc, sc 8) repeat 5 times, inc, sc 3 (60)
R13: (Inc, sc 9) repeat 6 times (66)
R14: Sc 6, (inc, sc 10) repeat 5 times, inc, sc 4 (72)
R15: Sc 5, (inc, sc 8) repeat 7 times, inc, sc 3 (80)
R16: (Inc, sc 9) repeat 8 times (88)
R17: Sc 6, (inc, sc 10) repeat 7 times, inc, sc 4 (96)
R18: (Inc, sc 15) repeat 6 times (102)
R19: Sc 9, (inc, sc 16) repeat 5 times, inc, sc 7 (108)
R20-22: Sc 108 (108)
R23: Sc 108 red and white parts together
White spots
Small (make 7)
Mr 6
Large (make 5)
Mr 6
R2: Inc 6 (12)
Assembly
Sew the white spots on the hat.
Align the head and the body with pins before sewing so the head won’t end up crooked. Important! Sew together the head and body’s R27, leaving the “neck frill” out.
Sew the hat on the head.
Your toy is now finished.
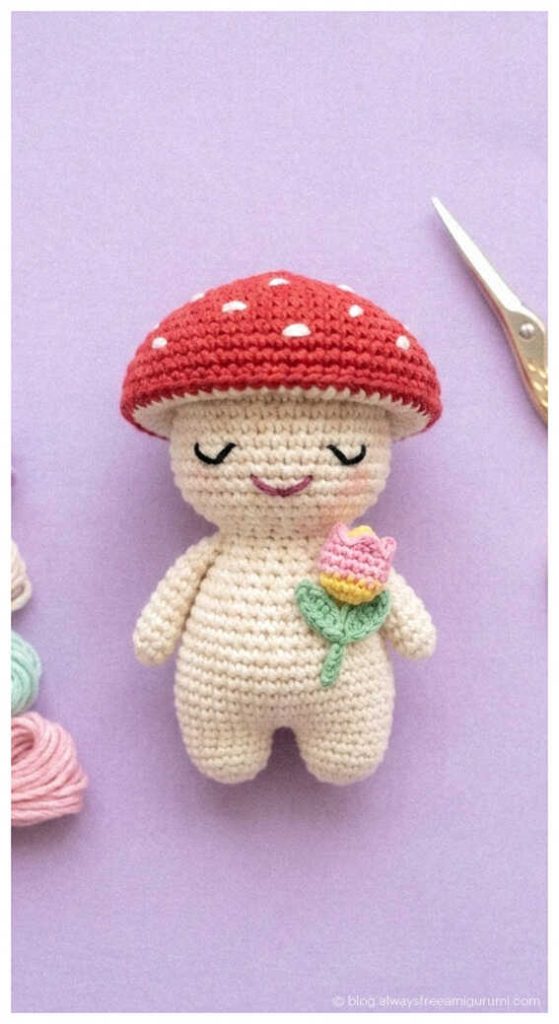
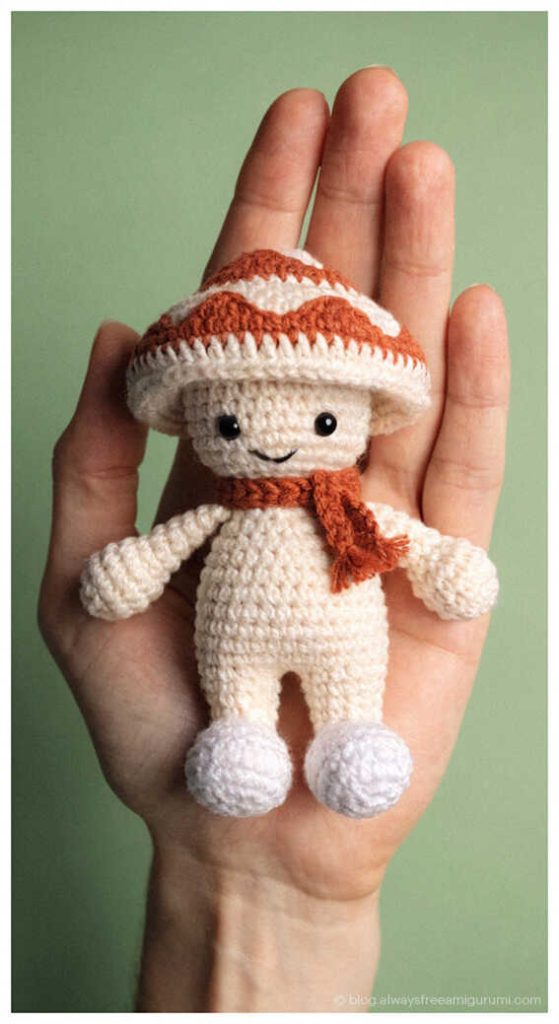
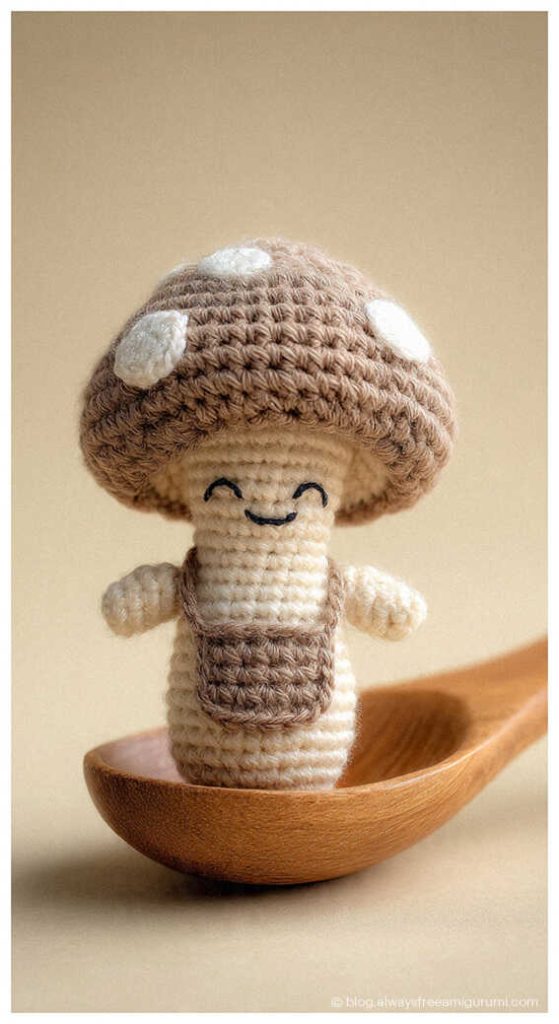
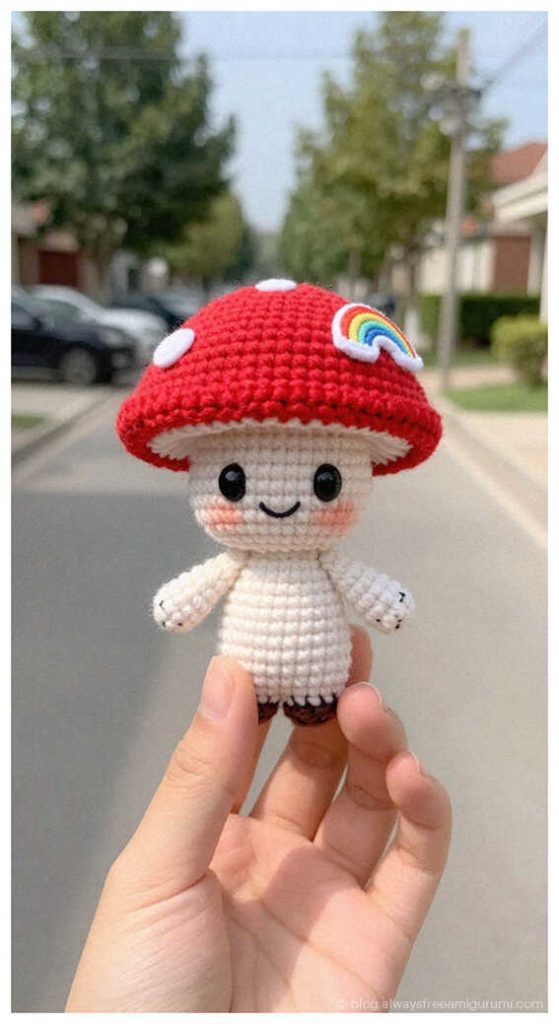
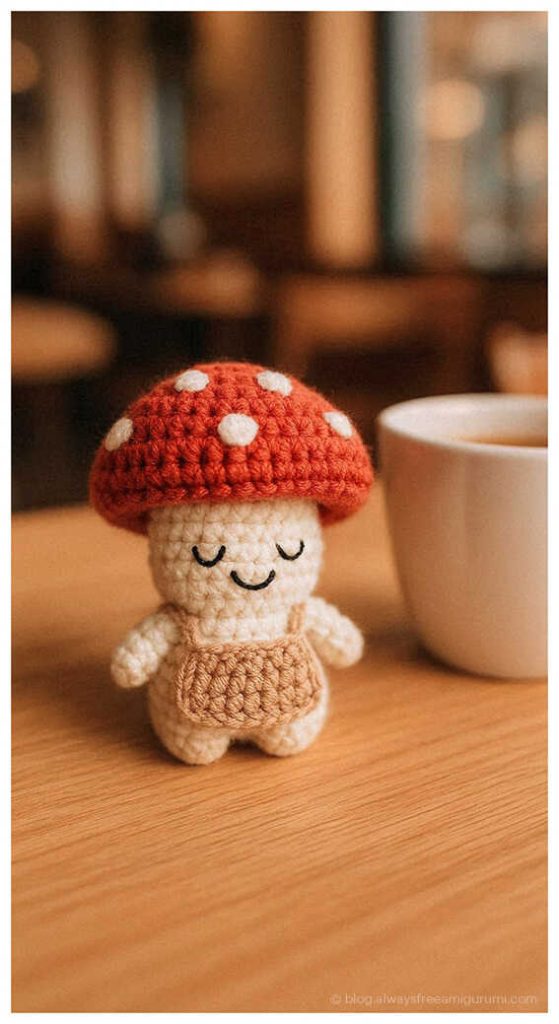
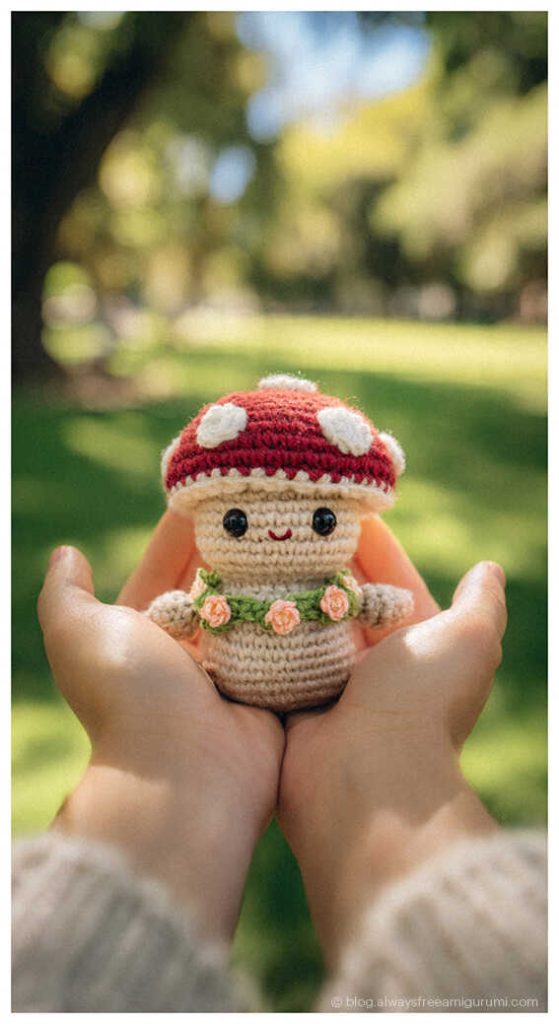
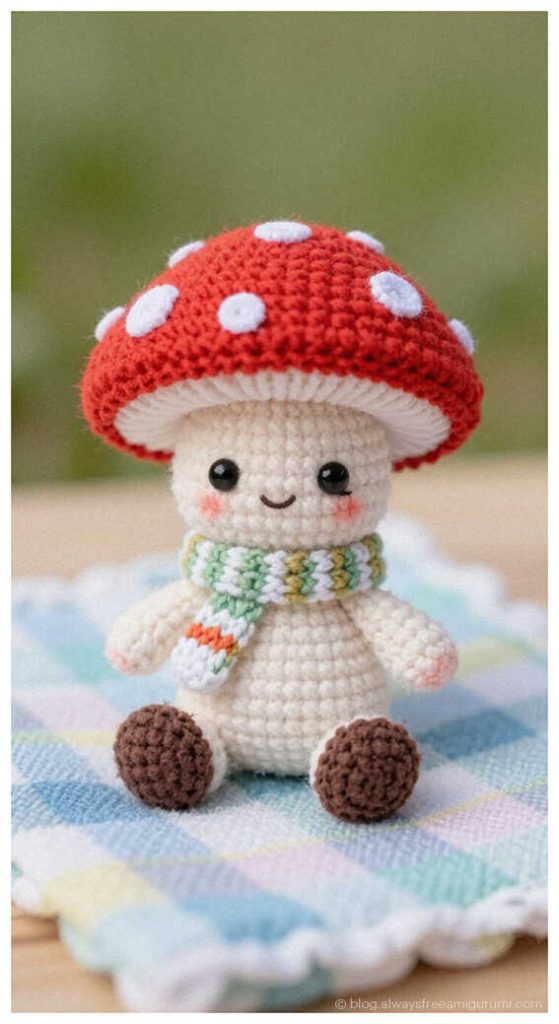
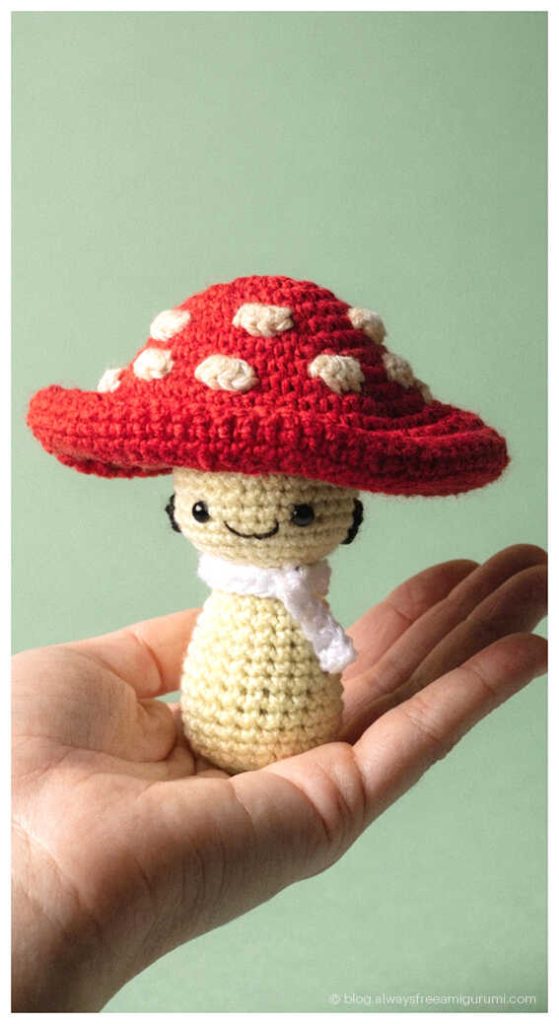
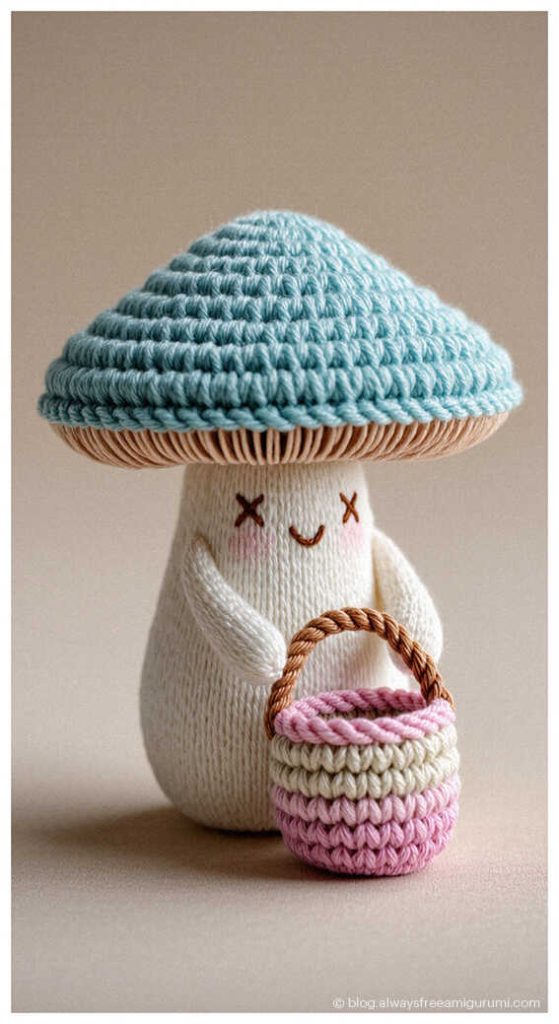
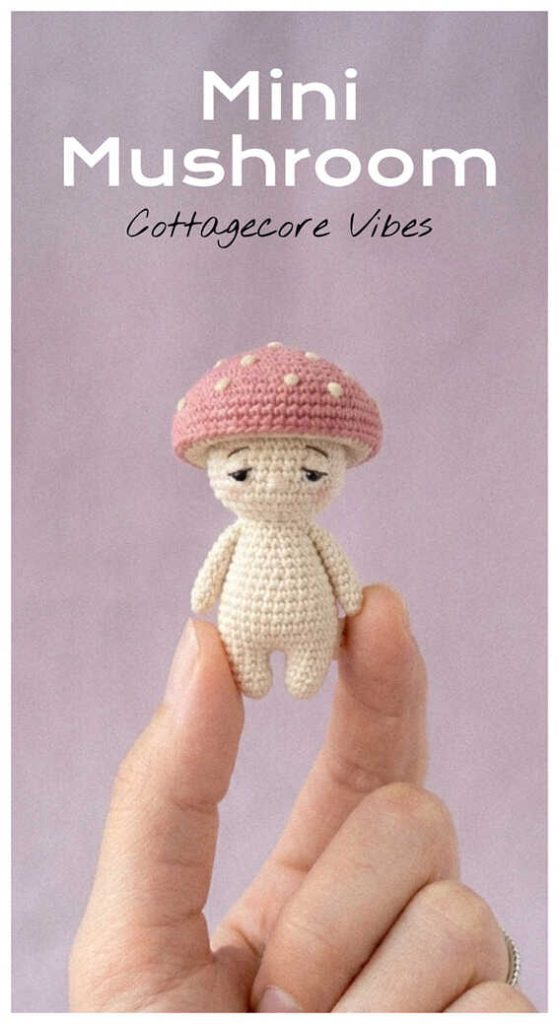
Mushroom Doll Amigurumi Ideas You’ll Want to Save