
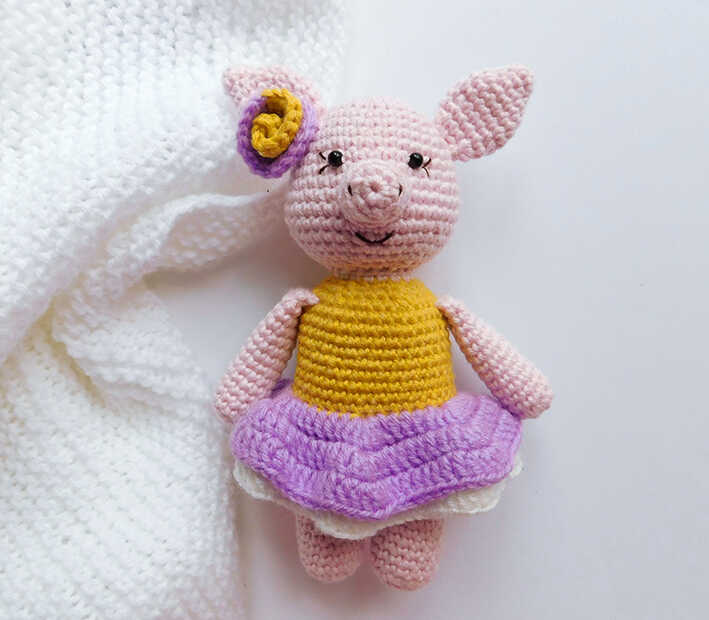
Cute Little Pig Amigurumi Free Pattern
Designer: Svetlana Bolotova
VK: @svetlana.bolotova
Difficulty Level: Easy
A sweet farm favorite to enjoy your crochet time
Small handmade toys always bring a cozy touch, and this design comes as a free Rosie Pig amigurumi pattern perfect for adding charm to your collection. With its gentle shape and soft outfit, Rosie Pig is ideal for DIY crochet gift ideas, nursery décor, or cute farm-themed toys. Its simple construction makes it suitable for easy crochet projects and beginner-friendly makers. We sincerely thank the designer for sharing this adorable Rosie Pig, and you will also find more inspiring amigurumi ideas at the end of the pattern.
Looking to make this cute Rosie Pig? Scroll down to access the original pattern source and start crocheting.
This design works beautifully as a quick amigurumi project, using basic stitches and smooth shaping. The finished size is about 15–16 cm, depending on your yarn and tension. If you enjoy farm animals, you might also love the mini sheep shared on our other blog.
The pattern uses semi-cotton yarn with a 1.5 mm crochet hook, along with beads for eyes, fiberfill stuffing, and basic tools. Cotton yarn gives a clean finish, while thicker yarn can create a larger plush toy. For another charming design, explore the tiny donkey featured on our blog.
Materials and Tools
• Semi-cotton yarn
• Crochet hook 1.5 mm
• Beads for eyes
• Fiberfill stuffing
• Sewing needle
• Scissors
Abbreviations
sc – single crochet
dc – double crochet
inc – increase
dec – decrease
sl st – slip stitch
ch – chain
ch st – turning chain
(…) x n – repeat n times
HOW TO CROCHET A CUTE LITTLE PIG AMIGURUMI
Legs and Body
Start with the legs, then continue into the body.
Left leg
R1: 6 sc in MR
R2: inc x 6 = 12 sc
R3: (3 sc, inc) x 3 = 15 sc
R4–R13: 15 sc (10 rounds)
At the end of R13, ch 1, pull the yarn through and cut.
Right leg
R1: 6 sc in MR
R2: inc x 6 = 12 sc
R3: (3 sc, inc) x 3 = 15 sc
R4–R13: 15 sc (10 rounds)
Join the legs.
Continue crocheting.
Ch 3 from the right leg and join to the left leg (insert hook from the side of the left leg). Mark the beginning of the round.
R14: Work in the round 36 sc as follows: 15 sc on the left leg, 3 sc on the chain, 15 sc on the right leg, 3 sc on the chain
R15–R19: 36 sc (5 rounds)
Change yarn color (shirt color).
R20: 36 sc
R21: 36 sc in back loops only (front loops of R20 will be used later for the skirt)
R22–R29: 36 sc (8 rounds)
R30: (4 sc, dec) x 6 = 30 sc
R31: (3 sc, dec) x 6 = 24 sc
R32: (2 sc, dec) x 6 = 18 sc
Change yarn to main color (neck).
R33: 18 sc
Leave a long yarn tail for sewing the head later (the head is crocheted separately).
Head
Start from the top of the head. The head will be sewn on.
R1: 6 sc in MR
R2: inc x 6 = 12 sc
R3: (sc, inc) x 6 = 18 sc
R4: (2 sc, inc) x 6 = 24 sc
R5: 24 sc
R6: (3 sc, inc) x 6 = 30 sc
R7: 30 sc
R8: (4 sc, inc) x 6 = 36 sc
R9: 36 sc
R10: 36 sc
R11: 36 sc
R12: (5 sc, inc) x 6 = 42 sc
R13: 42 sc
R14: 42 sc
R15: (5 sc, dec) x 6 = 36 sc
R16: 36 sc
R17: (4 sc, dec) x 6 = 30 sc
R18: (3 sc, dec) x 6 = 24 sc
R19: (2 sc, dec) x 6 = 18 sc
At the end of the round, ch 1, pull the yarn through and cut.
Arms (make 2)
R1: 6 sc in MR
R2: inc x 6 = 12 sc
R3–R14: 12 sc (12 rounds)
R15: Fold the top of the piece in half and crochet 6 sc through both layers.
At the end of R15, ch 1, pull the yarn through, leave a long tail for sewing, and cut.
Ears (make 2)
R1: 6 sc in MR
R2: 6 sc
R3: (sc, inc) x 3 = 9 sc
R4: (2 sc, inc) x 3 = 12 sc
R5: (3 sc, inc) x 3 = 15 sc
R6: 15 sc
R7: 15 sc
R8: (3 sc, dec) x 3 = 12 sc
R9: (2 sc, dec) x 3 = 9 sc
Snout
R1: 6 sc in MR
R2: inc x 6 = 12 sc
R3: 12 sc in back loops only
R4: 12 sc
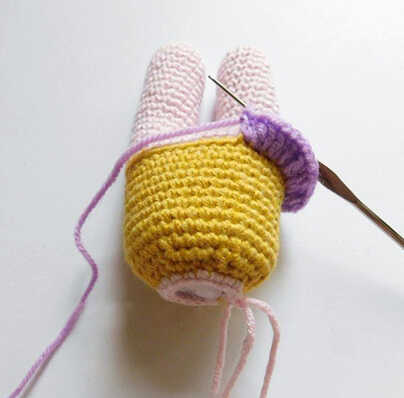
Skirt
Turn the body upside down with the legs facing away from you.
Crochet the skirt into the front loops of R20. Use two colors.
First ruffle
R1: (5 dc, inc [3 dc in one stitch]) x 6 = 48 dc, finish with sl st and ch st
R2: Work in front loops only (back loops will be used later for the second ruffle): (7 dc, inc [2 dc in one stitch]) x 6 = 54 dc, finish with sl st and ch st
R3: 54 dc, sl st
Change yarn color.
Second ruffle
R1: Work into the back loops of the first ruffle: 48 dc, finish with sl st and ch st
R2: (7 dc, inc [2 dc in one stitch]) x 6 = 54 dc, finish with sl st and ch st
R3: 54 dc, sl st
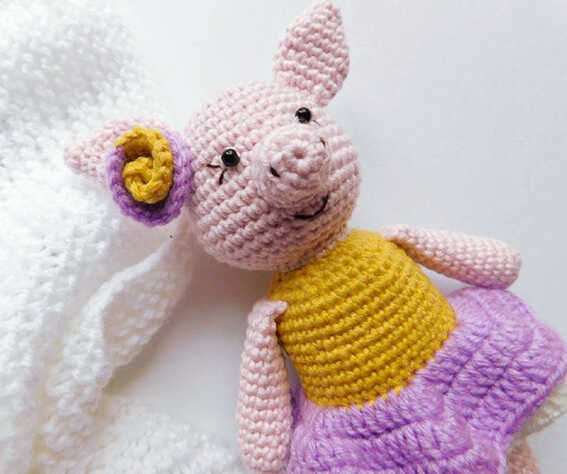
Rose
Ch 20.
Insert hook into the 3rd ch from hook.
Make about 7 consecutive increases using dc (2 dc in one stitch).
Change yarn color and continue making increases with dc in every stitch to the end of the row.
The strip will curl into a rose shape. Sew it neatly from the back so it does not unravel. Attach it at the base of the ear.
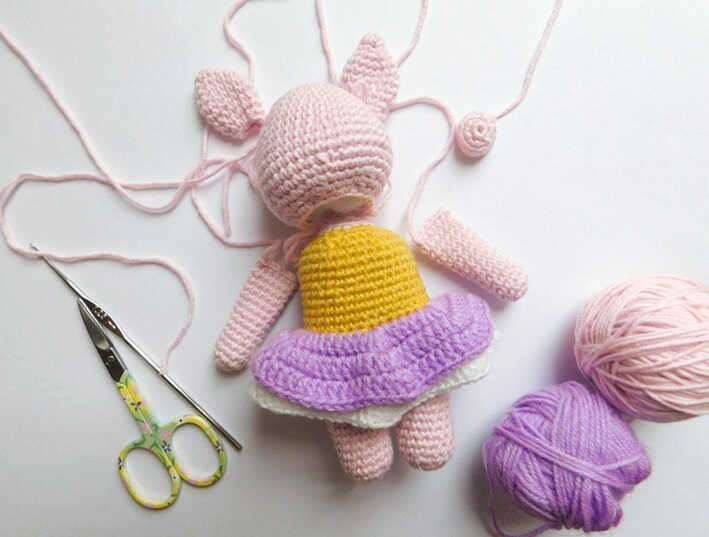
Assembly
Sew all parts together.
Sew the arms between R29 and R30.
Attach the eyes between R9 and R10 of the head.
Sew the ears between R5–R7.
Copyright & Credits
This pattern is designed by Svetlana Bolotova. You may sell finished toys made from this pattern; however, the pattern itself may not be published, redistributed, copied, translated, or shared in any form without the designer’s prior permission. When sharing photos of your finished work, please credit the designer.