Amigurumi Jemmy the Hippo Crochet Free Pattern
Designer: Gold_Kids_Krd
Instagram: @gold_kids_krd
Hello Amigurumi Lovers…
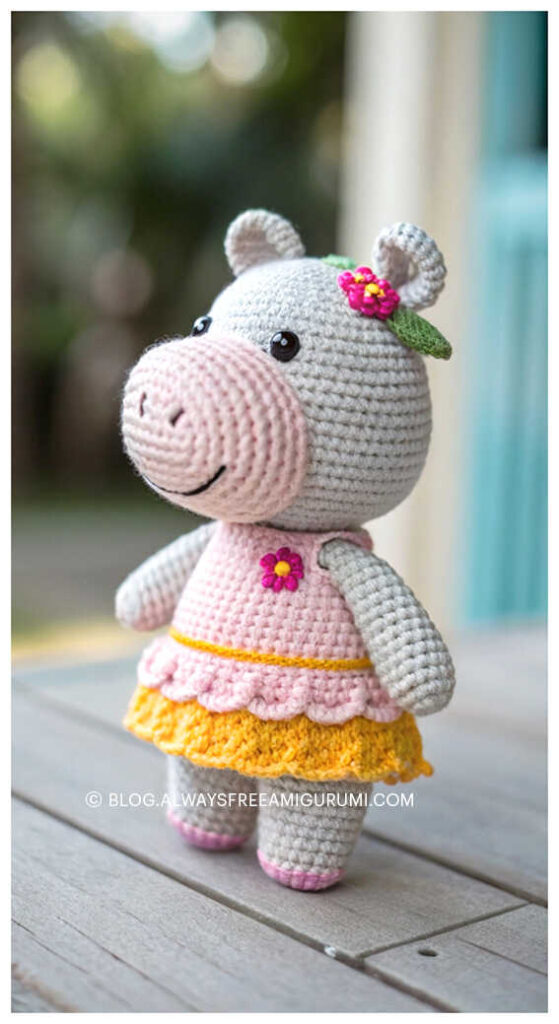
One of the free amigurumi crochet patterns we will share today is the amigurumi Jemmy the hippo, whose photos and design belong to Gold_Kids_Krd. You can learn how to crochet these hippo crochet using the free amigurumi pattern. Thanks to Gold_Kids_Krd for this cute hippo.

Amigurumi cats, amigurumi dolls, amigurumi dogs, amigurumi unicorns, amigurumi lambs, amigurumi dinosaurs, amigurumi foxes, amigurumi bears, amigurumi giraffes, amigurumi pigs, amigurumi birds, amigurumi penguins, amigurumi panda, amigurumi llama, amigurumi bunny, amigurumi clowns, amigurumi elephants, amigurumi hippos, amigurumi monkeys… All the amigurumi toys pattern step by step tutorials and ideas you are looking for are here… Don’t forget to visit our YouTube channel…
REQUIRED MATERIALS:
Plush yarn (I used TUNC LUX KADIFE No. 3266) – 1.5 to 2 skeins, depending on the tightness of your stitches.
Stuffing (I used polyester fiberfill).
Crochet hook size 3.5-4.5 mm (I used 4 mm).
Safety eyes or sew-on eyes (12 mm in diameter).
Eyelashes.
Glue for attaching eyelashes to the eyes.
Needle for sewing ears and nose.
Stitch markers to mark the beginning of each row.
Scissors.
Abbreviations:
MR – Magic Ring
ch – chain
sc – single crochet
inc – increase (2 sc in the same stitch)
dec – decrease (sc two stitches together)
sl st – slip stitch
(…) – the number of stitches in the row or the number of rows with the same stitch count.
*If you have difficulty making a magic ring, you can chain 2 and work the required number of sc into the second chain from the hook. This will create a similar effect to a magic ring.*
Start by crocheting small details (arms, tail) so they can be incorporated into the body as you crochet. If you prefer sewing them on later, you can adjust the sequence to suit your preference.
AMIGURUMI HIPPO FREE PATTERN
Legs (Make 2):
Rnd 1. 7 sc in MR
Rnd 2. inc in each stitch around (14)
Rnd 3-6. 14 sc (4 rounds)
Rnd 7. dec twice, 10 sc (12)
Rnd 8. dec, 10 sc (11)
Rnd 9. dec, 9 sc (10)
Rnd 10. dec, 8 sc (9)
Rnd 11. dec, 7 sc (8)
Rnd 12-14. 8 sc (3 rounds)
Rnd 15. dec, 6 sc (7)
– Stuff the legs lightly while crocheting. Leave the last 2 rounds unstuffed so the legs don’t stick out awkwardly.
– Flatten the leg and crochet 4 sc across both sides to close.
Tail:
Rnd 1. 6 sc in MR
Rnd 2. inc in each stitch around (12)
Rnd 3-4. 12 sc (2 rounds)
Rnd 5. (dec, 4 sc) *2 (10)
Rnd 6. dec, 8 sc (9)
Rnd 7. dec, 7 sc (8)
Rnd 8. 8 sc
– Lightly stuff the tail.
– Flatten and crochet 3 sc across both sides to close.
Ears (Make 2):
Rnd 1. 6 sc in MR
Rnd 2. inc in each stitch around (12)
Rnd 3. (5 sc, inc) *2 (14)
Rnd 4. 14 sc
Rnd 5. dec, 12 sc (13)
Rnd 6. dec, 11 sc (12)
Rnd 7. dec, 10 sc (11)
Rnd 8. dec, 9 sc (10)
Rnd 9. dec, 8 sc (9)
Rnd 10. 9 sc
– Lightly stuff the ears.
– Flatten and crochet 4 sc across both sides to close.
– The decreases on one side should create a slight curve in the ears.
Body:
Legs:
Rnd 1. 9 sc in MR
Rnd 2. inc in each stitch around (18)
Rnd 3-8. 18 sc (6 rounds)
Fasten off the first leg without closing.
Repeat for the second leg but do not fasten off.
Joining the legs:
– Chain 4 from the second leg and connect it to the first leg with a sc in the unfastened stitch.
– Place a stitch marker to mark the beginning of the round.
Rnd 9. 46 sc
Rnd 10. 17 sc, inc 7 times, 22 sc (53)
*Ensure that the increases are centered between the legs, forming the belly.*
Rnd 11. (sc, inc) *2, 16 sc, (inc, 5 sc) *2, inc, 16 sc, inc, 3 sc, inc, 2 sc (59)
Rnd 12-13. 59 sc (2 rounds)
*Stuff the legs firmly so the hippo can stand steadily.*
In the next round, attach the tail.
Rnd 14. 55 sc, 3 sc together with the tail, 1 sc (59)
Rnd 15-22. 59 sc (8 rounds)
*Stuff the body while crocheting. The belly should be well-rounded.*
Rnd 23. dec, 27 sc, dec, 20 sc, dec, 6 sc (56)
Rnd 24. (12 sc, dec) *4 (52)
Rnd 25. 5 sc, (dec, 11 sc) *3, dec, 6 sc (48)
Rnd 26. (10 sc, dec) *4 (44)
Rnd 27. 4 sc, (dec, 9 sc) *3, dec, 5 sc (40)
Rnd 28. (6 sc, dec) *5 (35)
Rnd 29. 2 sc, (dec, 5 sc) *4, dec, 3 sc (30)
Rnd 30. (4 sc, dec) *5 (25)
Rnd 31. (3 sc, dec) *5 (20)
Rnd 32. (2 sc, dec) *5 (15)
Rnd 33. 15 sc
Rnd 34. 7 sc, inc, 7 sc (16)
Head:
*Stuff the neck firmly so the head doesn’t wobble.*
Rnd 35. (sc, inc) *8 (24)
Rnd 36. (2 sc, inc) *8 (32)
Rnd 37. (3 sc, inc) *8 (40)
Rnd 38. (4 sc, inc) *8 (48)
Rnd 39. (5 sc, inc) *8 (56)
Rnd 40. (7 sc, inc) *7 (63)
Rnd 41-45. 63 sc (5 rounds)
Rnd 46. (7 sc, dec) *7 (56)
Rnd 47. (12 sc, dec) *4 (52)
Rnd 48. (11 sc, dec) *4 (48)
Rnd 49. (6 sc, dec) *6 (42)
Rnd 50. (5 sc, dec) *6 (36)
*Stuff the head.*
Rnd 51. (4 sc, dec) *6 (30)
Rnd 52. (3 sc, dec) *6 (24)
Rnd 53. (2 sc, dec) *6 (18)
*Add more stuffing for an evenly rounded shape.*
Rnd 54. (sc, dec) *6 (12)
Rnd 55. 6 dec (6)
Fasten off and close the opening.
Nose:
Rnd 1. Ch 13
Rnd 2. Starting in the second chain, inc, 9 sc, 4 sc in the last stitch. Turn and work along the other side: 9 sc, inc (26)
Rnd 3. 2 inc, 9 sc, 4 inc, 9 sc, 2 inc (34)
Rnd 4. (sc, inc) *2, 11 sc, (sc, inc) *3, 12 sc, inc (40)
Rnd 5. (3 sc, inc) *2, 7 sc, (3 sc, inc) *3, 12 sc, inc (46)
Rnd 6. (dec, 21 sc) *2 (44)
Rnd 7. (dec, 20 sc) *2 (42)
Rnd 8. 42 sc
*Shape the nose and lightly stuff it.*
Rnd 9. (dec, 19 sc) *2 (40)
Rnd 10. 2 dec, 12 sc, 4 dec, 12 sc, 2 dec (32)
Rnd 11. 3 sc, dec, (6 sc, dec) *3, 3 sc (28)
WE STUFF THE Nose WITH FILLER!
Assembly:
Sew the ears and nose onto the head. The nose should be attached between rounds 35 and 41.
For ease, first pin the pieces to the head using knitting needles so you can adjust their placement if needed.
Once satisfied with the position, sew them securely with a needle and thread.
Cut two equal pieces of yarn (15-20 cm) for the nostrils. Using a crochet hook, pull them through where you want the nostrils to be. Then sew them in place with a needle and thread, pulling the ends inside the nose to secure.
Attach the eyelashes to the eyes using glue. Fix the eyes to the head securely—I used a hot glue gun for this.
Insert the glue gun nozzle deep into the fabric between stitches, squeeze out enough glue, and quickly insert the eyes before the glue sets.
Your hippo is now ready!
More amigurumi hippo ideas: