
Free Ginger Kitten Amigurumi Crochet Pattern
Designer: Olga Filippova
Instagram: @zefirka.room
Difficulty Level: Beginner
A Sweet Little Kitten Ready for Your Hook.
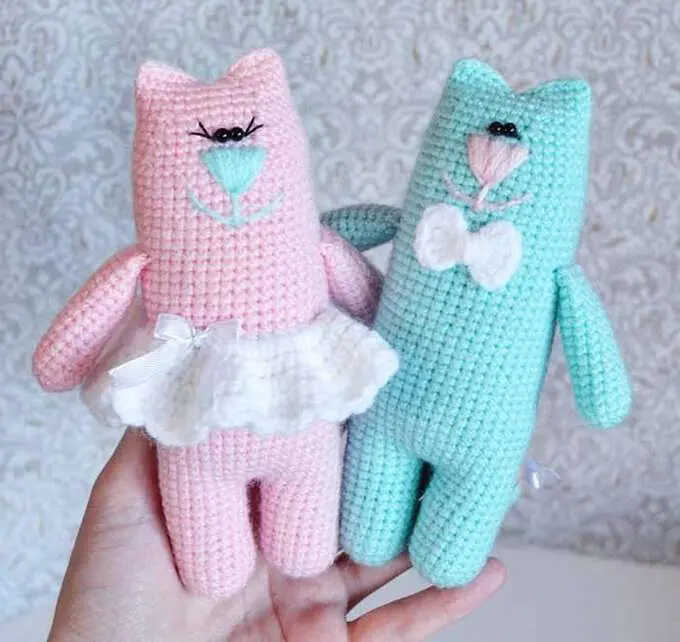
Bring a cozy handmade touch to your crochet time with this adorable feline project. This free ginger kitten amigurumi crochet pattern is designed by Olga Filippova (@zefirka.room) and features a cuddly kitten with a playful personality. It makes a lovely handmade gift idea, nursery decoration, or soft crochet toy. The head and body are worked as one piece, making it a great low sew amigurumi project. We sincerely thank Olga Filippova for sharing this charming design. If you enjoy cute animal projects, take a look at this amigurumi fox on our blog.
This beginner-friendly pattern uses basic stitches and easy shaping. It is a relaxing quick crochet project that works well for all skill levels. When made with plush yarn, the finished kitten measures approximately 28–29 cm, while cotton-blend yarn creates a smaller version of about 16 cm. You may also enjoy this adorable amigurumi bunny, another favorite among cute crochet animal lovers.
The pattern can be made with plush yarn for a soft finish or cotton-blend yarn for a more defined look. To complete this small crochet project, you only need yarn, a crochet hook, stuffing, safety eyes, and basic tools. Discover more adorable amigurumi kitten friends waiting further below.

Discover more adorable amigurumi kitten friends waiting further below.
Materials and Tools
• Yarn:
▸ Himalaya Dolphin Baby
▸ YarnArt Dolce
• 4 mm crochet hook
• Thin thread for sewing parts
• Safety eyes
• Fiberfill stuffing
• Stitch markers
• Needle
• Scissors
Abbreviations
MR — magic ring
ch — chain
sc — single crochet
inc — increase
dec — decrease
(…) x n — repeat n times
HOW TO CROCHET A GINGER KITTEN AMIGURUMI
Legs (Make 2)
R1: 6 sc in MR (6)
R2: inc x 6 (12)
R3: (1 sc, inc) x 6 (18)
R4–R13: 18 sc
Finish the first leg.
Fasten off and cut the yarn.
Crochet the second leg in the same way, but do not cut the yarn.
Body
R14: Ch 2, join the legs, 18 sc around the first leg, 2 sc along the chain, 18 sc around the second leg, 2 sc along the chain (40)
Place a marker to indicate the beginning of the round.
Stuff as you crochet.
R15–R47: 40 sc
R48: (7 sc, dec) x 4 (36)
R49: 36 sc
R50: (6 sc, dec) x 4 (32)
R51: 32 sc
R52: (5 sc, dec) x 4 (28)
R53–R55: 28 sc
Fold the opening flat.
Crochet sc through both layers across the opening.
Fasten off, cut the yarn, and hide the yarn tail.
Arms (Make 2)
R1: 6 sc in MR (6)
R2: inc x 6 (12)
R3–R18: 12 sc
Lightly stuff the arms.
Fold the opening flat.
Crochet sc through both layers across the opening.
Fasten off, cut the yarn, and hide the yarn tail.
Tail
R1: 5 sc in MR (5)
R2: inc x 5 (10)
R3–R25: 10 sc
Lightly stuff the tail.
Fold the opening flat.
Crochet sc through both layers across the opening.
Fasten off, cut the yarn, and hide the yarn tail.
Assembly
Since plush yarn such as Himalaya Dolphin Baby or YarnArt Dolce tends to shed, use reinforced thread or thin yarn for assembly.
Sew the parts together in the following order:
• Sew on the arms
• Sew on the tail
• Attach the eyes
• Embroider the nose
• Embroider the eyebrows
• Embroider the whiskers
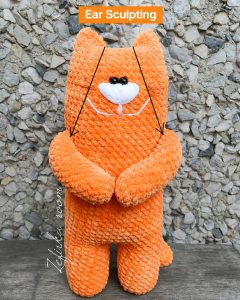
Ear Sculpting
– The ears are formed using thread sculpting and are not crocheted separately.
– Using a strong thread and a long needle, insert the needle near the top of one side of the head and bring it out near the muzzle area, following the shaping shown in the reference photo. Repeat on the opposite side.
– Pull the thread firmly to create two pointed ear shapes at the top of the head.
– Secure the thread and hide the thread ends inside the toy.
– If desired, crochet a small heart or star and sew it onto the belly as decoration.
Copyright & Credits
This pattern is designed by Olga Filippova; you may sell finished toys made from this pattern, but please credit the designer by tagging @zefirka.room and linking to their social media when sharing your work.